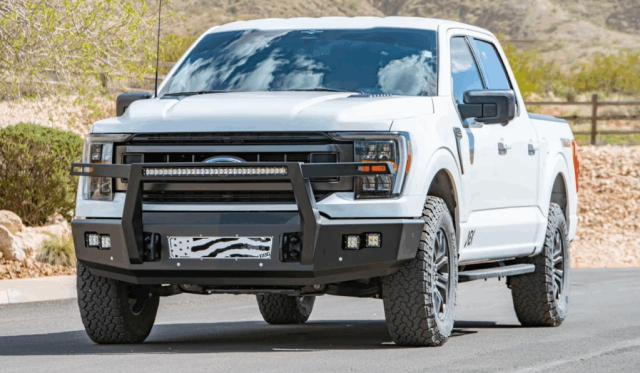
A Bolt-On Steel Upgrade
This article may contain affiliate links.
Installing a heavy-duty front bumper is one of the most satisfying truck upgrades you can do yourself. You get real protection, a meaner look and the confidence that your rig is ready for anything—from backroads to job sites. The good news? Modern aftermarket bumpers are built for bolt-on installation to factory mounting points, meaning there’s no need to cut or drill into your truck’s frame. If you’re running a newer Ford pickup, for example, you can check out the range of 2021-2024 Ford F150 bumpers, all designed to mount cleanly with the included hardware and brackets. The process is easier than most think. With a few basic tools and a bit of patience, you can get a factory-quality fit right in your driveway.
Let’s break down how to do it the right way—step by step.
1. Gather Tools and Prepare Your Workspace
Before diving in, make sure you’ve got:
Socket and wrench set
Ratchet extensions
Torque wrench
Trim removal tool (for plastic clips)
Floor jack or a second set of hands
Park on level ground, set the parking brake, and disconnect the battery. You’ll be working near wiring for fog lights and sensors, so it’s best to cut the power early.
2. Remove the Factory Bumper
Start by unplugging fog lights, parking sensors and any front cameras if your truck has them. Use a trim tool to pop off the plastic valence or air dam, then unbolt the factory bumper brackets. Have a buddy steady the bumper as you pull it off—OEM units are lighter than aftermarket steel ones, but still awkward to handle.
Keep your factory bolts and clips organized. You may reuse some of them for the new install.
3. Inspect Mounting Points and Hardware
Once the stock bumper is off, inspect the frame horns and mounting areas. Clean off dirt, rust or loose debris. Test-fit your new heavy-duty bumper by lining up the brackets with the factory mounting points. Everything should line up without resistance.
If it doesn’t, don’t force it—loosen the alignment bolts and double-check your brackets. A good bumper, like the ones from trusted brands on BumperStock, should fit perfectly without modification.
4. Bolt Up the New Bumper
Now for the fun part. With a helper or a jack stand holding the bumper in place, slide the mounting bolts through the factory holes and start threading the nuts by hand. Don’t torque anything yet—keep it loose so you can make minor alignment adjustments.
Once centered, tighten everything gradually. Use a torque wrench to secure all bolts to the manufacturer’s recommended specs. This keeps the bumper properly seated and prevents frame stress.
5. Reconnect Electrical Components
Reconnect fog lights, sensors and cameras using the supplied wiring harnesses or adapters. Most aftermarket bumpers include dedicated cutouts for these systems, so nothing should feel out of place.
Make sure all connections are secure and test your lights before finishing up. If you’ve added auxiliary lighting, now’s a good time to wire it cleanly through relays or a switch panel.
6. Check Alignment and Clearance
Step back and check the fit. The bumper should sit even with your grille and fenders, with consistent gaps across both sides. Confirm that all sensor and camera functions work properly.
Turn the steering wheel lock-to-lock and ensure there’s no rubbing on tires or suspension parts. If you plan to add a winch or light bar, double-check that everything clears before final tightening.
7. Final Torque and Test Drive
Once everything looks good, torque all bolts again and clean the bumper’s surface. Most come with a durable black powder-coat finish, so a quick wipe with microfiber will make it pop.
Take the truck for a short drive and recheck all fasteners afterward. It’s normal for metal to settle slightly after the first few miles.
Pro Tips for a Clean Install
Before calling the job done, keep these quick pointers in mind for the best results:
Label connectors before removal—saves time during reinstallation.
Use anti-seize compound on bolts to prevent corrosion and make future removal easier.
Align before tightening—snug everything up loosely first, then torque in sequence.
Recheck torque after 200–300 miles of driving.
Keep touch-up paint handy for chips or scratches on the powder coat.
Conclusion
Installing a heavy-duty bumper without drilling isn’t complicated. With a direct-fit design and bolt-on installation, you can go from unboxing to road-ready in an afternoon.
A good bumper adds more than just toughness. It’s protection, function and style all in one solid upgrade. Choose a model built for your truck, follow the steps above, and you’ll have a front end that looks good, performs better and takes a hit without flinching.
The post Step-by-Step Guide: How to Install a Heavy-Duty Front Bumper Without Drilling first appeared on Clean Fleet Report.


